


An Overview of the Linode Cloud Manager
Traducciones al EspañolEstamos traduciendo nuestros guías y tutoriales al Español. Es posible que usted esté viendo una traducción generada automáticamente. Estamos trabajando con traductores profesionales para verificar las traducciones de nuestro sitio web. Este proyecto es un trabajo en curso.
The Linode Cloud Manager provides a user-friendly interface to manage your infrastructure, user accounts, billing and payments, and to open and track support tickets. You can easily create Linode instances, managed Kubernetes clusters, add backups to your Linodes, deploy Marketplace Apps, track event notifications, create Object Storage buckets, and more. The Cloud Manager is implemented solely atop our public APIv4, which gives you access to all our latest products and services.
In this Guide
This guide provides an overview of the features and services available in Linode’s Cloud Manager. Some of the topics that will be discussed are:
- An introduction to each section of the Cloud Manager, including links to related guides throughout our documentation library.
- The location of commonly used Cloud Manager features.
- Settings that might make your overall Cloud Manager experience better
Linodes
The Linodes section of Cloud Manager allows you to create and manage your Linodes. Each Linode instance in Cloud Manager includes:
- Summary information about your Linode, like CPU usage, IPv4 and IPv6 traffic, and Disk IO
- Access to any of your Linode’s attached Volumes and the ability to create a Volume
- Networking information and features, including the ability to add IPv4 and IPv6 addresses, IP transfer and IP sharing
- The ability to resize your Linode, boot your Linode into Rescue Mode, and rebuild your Linode
- Access to Linode’s Backup service
- An Activity Feed that displays any relevant events related to this Linode
- Settings that allow you to update your Linode’s label, reset your Linode’s root password, manage system usage email notifications, manage Watchdog (Linode’s automatic reboot feature), and delete your Linode
- Areas to manage disks and manage configuration profiles
- Cross data center migrations
Find Your Disks
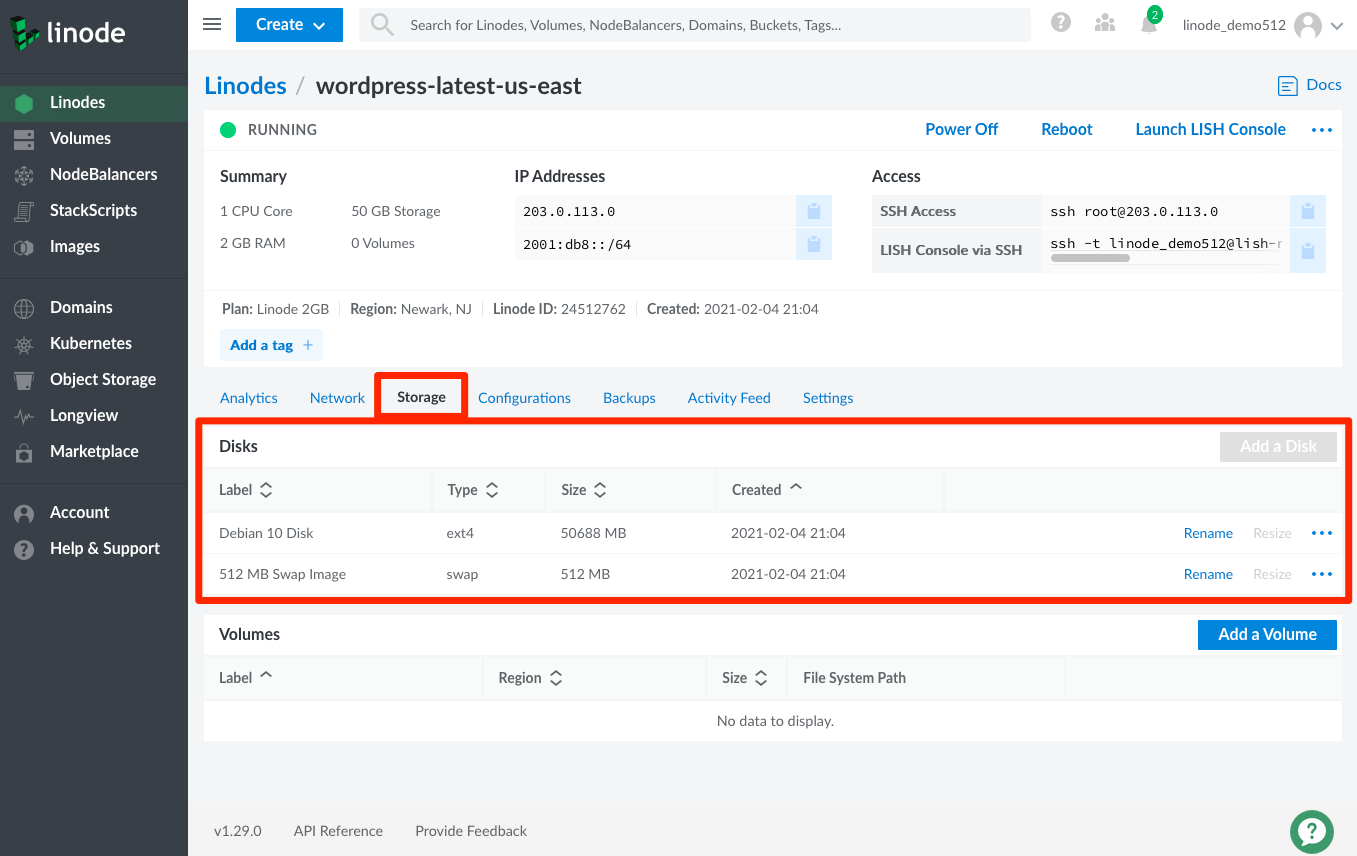
You can find your Linode’s disks in the Storage tab of the Linode’s detail page.
Click the Linodes link in the sidebar menu and select the Linode whose disks you’d like to see.
Then click the Storage tab. The disks are located in the Disks panel. Here you can add a disk if your Linode has unallocated disk space. For each individual disk, you can rename or resize the disk by clicking the respective Rename or Resize options, or click the more options ellipses to get a drop down menu for options such as
Imagize,Clone, andDelete. On smaller views, theRenameandResizeoptions are also accessible from the more options ellipses. See the Linode Disks and Storage guide for additional details and instructions.

Reboot Your Linode
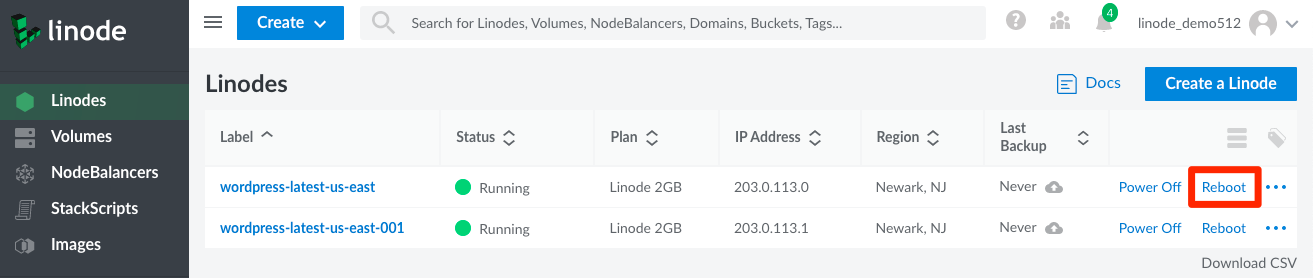
You can reboot a Linode from two places within the Cloud manager.
From your Linodes listing page, click Reboot for the desired Linode. For smaller windows, first click the More Options Ellipses and then select Reboot.


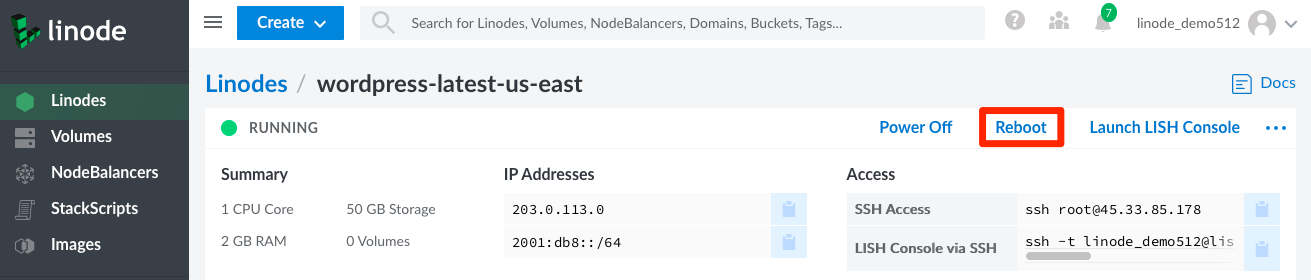
You can also reboot your Linode from within any Linode details page by clicking on the Reboot option. For smaller windows, first click the More Options Ellipses and then select Reboot.


Delete a Public IP Address
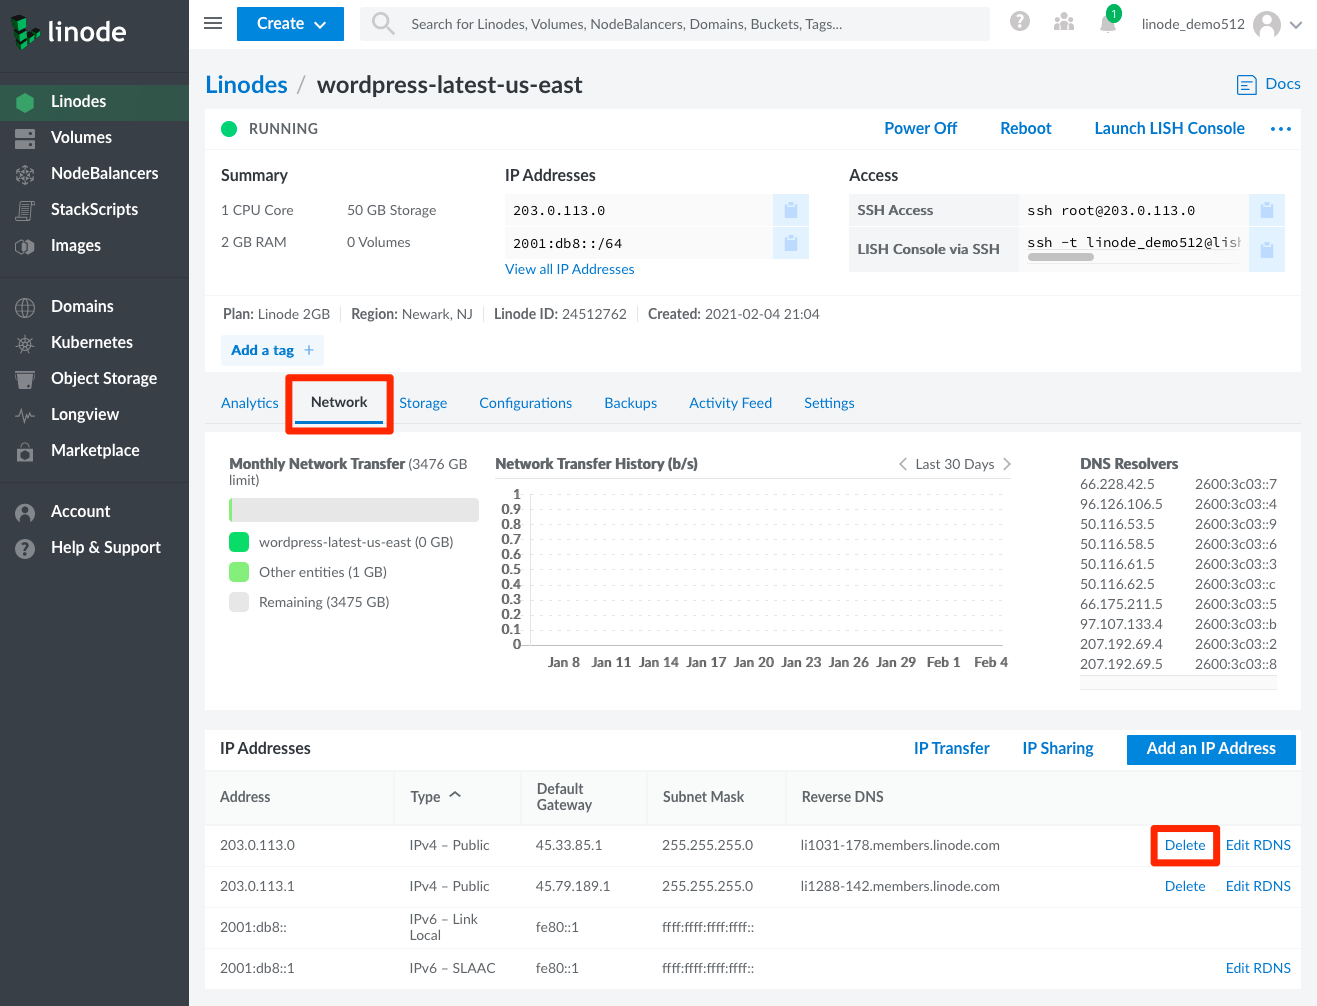
You can delete a public IP addresses within the Cloud Manager from the Network tab in a Linode’s details page.
Click Linodes from the sidebar menu.
Choose the Linode you wish to modify to enter the Linode detail screen. Then, click on the Network tab. Your IPv4 and IPv6 addresses are listed here.
In the IP Addresses section, next to the public IPv4 address you want to delete, click Delete.


A confirmation popup appears where you can confirm or cancel the operation.
Note
You must have at least one public IP on a Linode. If you attempt to delete the last public IP on a Linode, an error message appears after you confirm the deletion.
Volumes
The Volumes section of Cloud Manager gives you access to Linode’s Block Storage service. To learn how to create, and manage Block Storage volumes using Cloud Manager, see our How to Use Block Storage with Your Linode guide.
Object Storage
The Object Storage section of Cloud Manager gives you access to Linode’s Object Storage service which is a globally-available, S3-compatible method for storing and accessing data.
To learn how to use Object Storage, view the Get Started with Object Storage guide or take a look through all the Object Storage guides.
NodeBalancers
Linode’s NodeBalancers service provides load balancing for your applications and services ensuring that they are highly available for users. To learn how to get started with NodeBalancers using Cloud Manager, see our Getting Started with NodeBalancers guide.
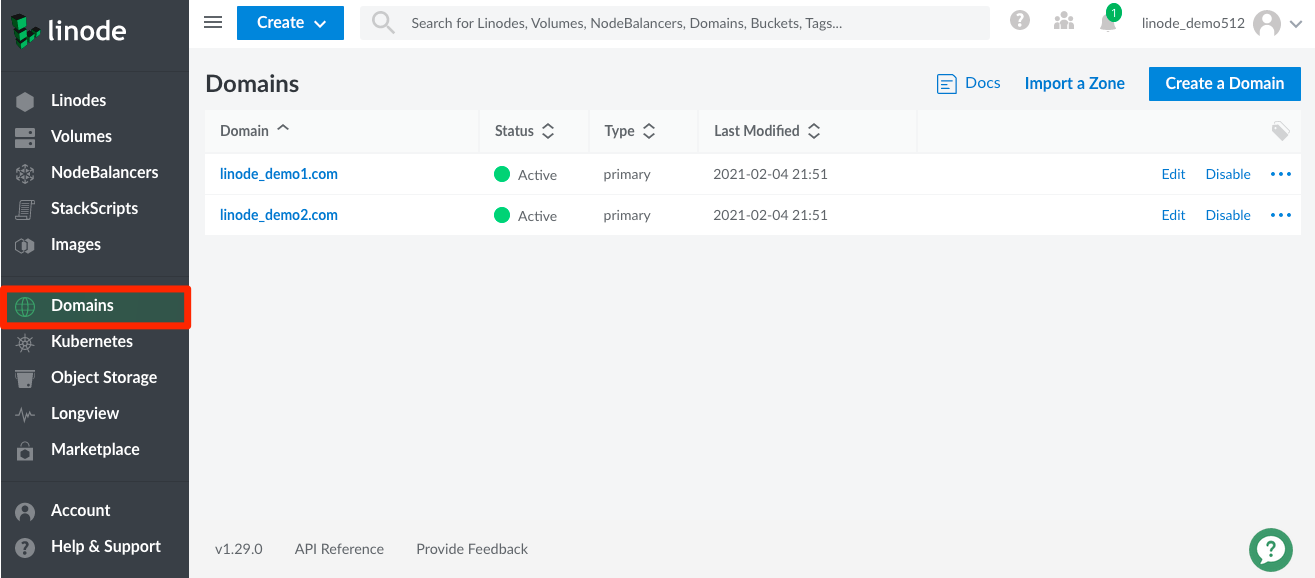
Domains (DNS Manager)
The DNS Manager allows you to control and manage your domains. You can access the DNS Manager by navigating to the Domains link in the Cloud Manager’s sidebar.


For more information on Cloud Manager’s DNS Manager, see the following guides:
Zone Files
The Cloud Manager automatically ensures that your Domain’s zone file does not contain any errors when a Domain Record is created or updated.
NoteThis Cloud Manager and API v4 functionality is currently under active development.
When creating a Zone File for a Domain, the Linode API v4 checks for any errors that may exist. If an error is found, the Cloud Manager will respond with the corresponding error. This means that the Cloud Manager will not allow you to create an invalid zone file.
Once your Domain and corresponding Zone File is created, you can use the
digcommand to further verify that each domain record contains the information you expect. It will take a few moments before a newly created domain record will show up when issuing thedigcommand.dig example.com dig example.com MXSee the Use dig to Perform Manual DNS Queries guide for more details on the
digcommand.
Longview
The Longview section of Cloud Manager gives you access to Linode’s system data graphing service. It tracks metrics for CPU, memory, and network bandwidth, both aggregate and per-process, and it provides real-time graphs that can help expose performance problems. The Longview service offers both free and paid plan tiers.
To get started using Longview, see the Understanding Linode Longview guide.
Marketplace
The Marketplace section of Cloud Manager gives you access to apps that make it easy to deploy and configure Marketplace Apps on a Linode. Some popular Marketplace Apps are WordPress, Minecraft, and GitLab. We are actively adding new and useful Marketplace apps. When a Marketplace App is deployed, a new Linode is created and the appropriate software is installed with the configurations you provide.
See How to Use Linode’s Marketplace Apps to get started using Marketplace Apps in Cloud Manager.
Kubernetes
The Kubernetes section of Cloud Manager gives you access to our managed Kubernetes service, the Linode Kubernetes Engine (LKE). LKE is a fully-managed container orchestration engine for deploying and managing containerized applications and workloads. LKE combines Linode’s ease of use and simple pricing with the infrastructure efficiency of Kubernetes.
To get started using LKE, see our Tutorial for Deploying and Managing a Cluster with Linode Kubernetes Engine.
StackScripts
StackScripts provide Linode users with the ability to automate the deployment of custom systems on top of our default Linux distribution images. StackScripts are usually Bash scripts, stored in the Linode Cloud Manager, and can be accessed when you deploy a Linode. Linodes deployed with a StackScript run the script as part of the first boot process.
To get started using StackScripts in Cloud Manager, see the Automate Deployment with StackScripts guide.
Images
The Images section of Cloud Manager gives you access to Linode Images which allow you to take snapshots of your disks, and then deploy them to any Linode under your account. This can be useful for bootstrapping a master image for a large deployment, or retaining a disk for a configuration that you may not need running, but wish to return to in the future.
To get started using Images with Cloud Manager, see Linode Images.
Account (Management and Billing)
The Account section of Cloud Manager allows you to manage your account’s billing information and users, and to configure various account-wide settings.
You can manage the following account and billing settings in the Account section of Cloud Manager:
- Update contact information
- Adding a New Payment Method
- Making a One-Time Payment
- View recent invoices and payments
- Add new users and manage exiting user’s profiles and permissions
- Enable Backup auto enrollment for all new Linodes on your account
- Enable Network Helper
- Cancel Object Storage
- Add the Linode Managed service to your account
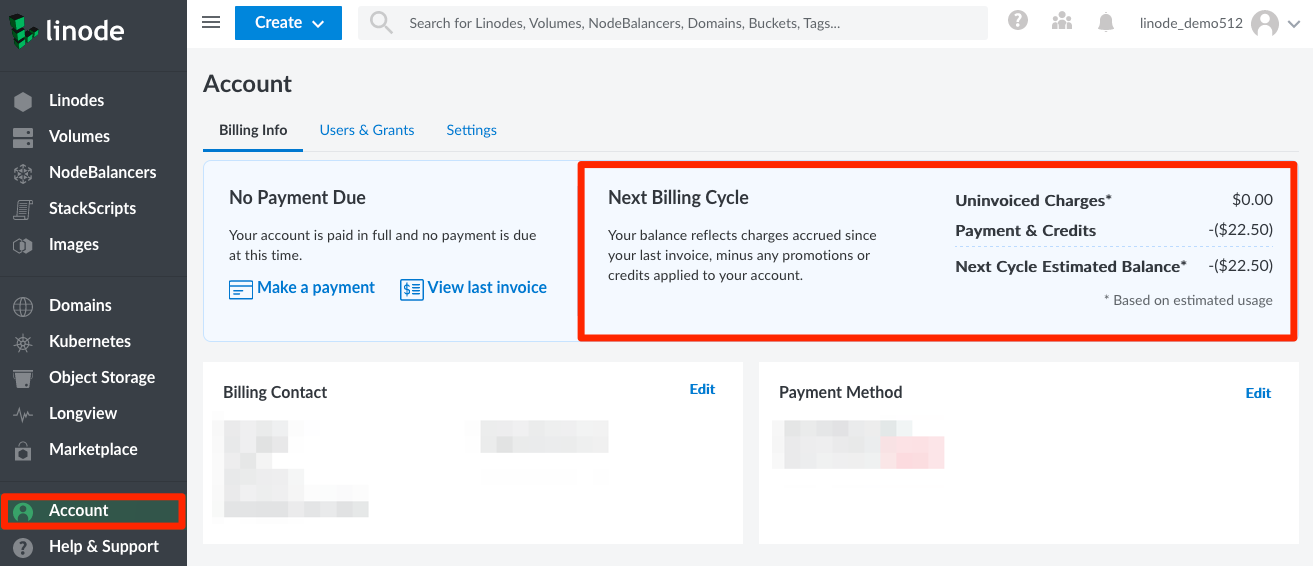
Find Credit Remaining
To find the amount of available credit that you have:
Click on the Account link from the sidebar menu to access the Billing Info page.
At the top of the page, the Next Billing Cycle section lists any remaining account credit under Payment & Credits.


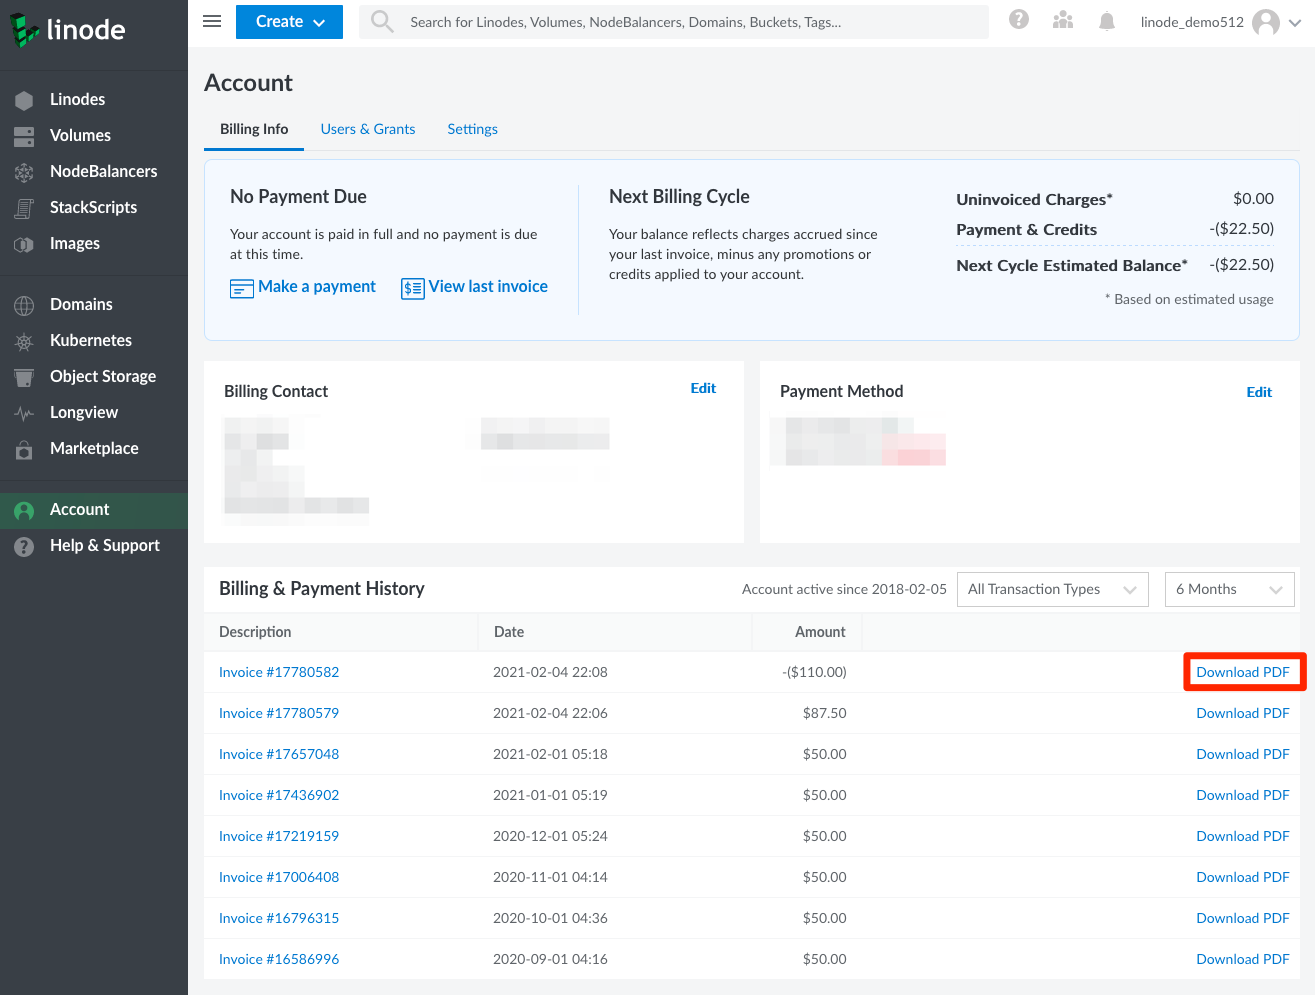
Printing an Invoice
You can download a printable PDF of your billing invoice from your list of invoices or from within an individual invoice.
Click on the Account link from the sidebar menu to access the Billing Info page.
Your recent invoices are listed under the Billing & Payment History section. Each invoice has a Download PDF link next to it.


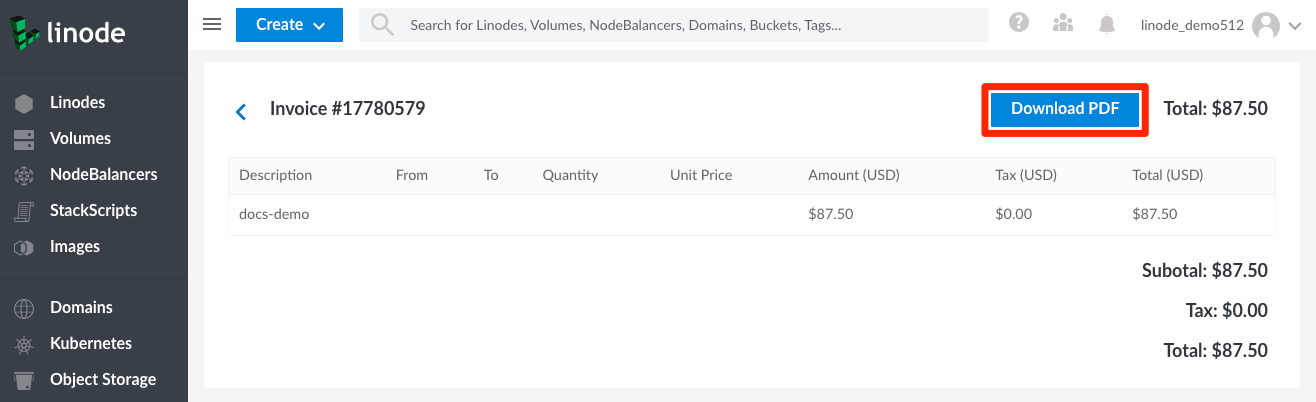
You can also click on any invoice to view it within the Cloud Manager. At the top of the invoice there is a Download PDF button.


Password Management
The Cloud Manager does not support forcing password expirations. Forcing password resets on a schedule is bad practice from a security perspective. Current security research indicates that forced password changes do more harm than good. If you want to force password resets for users of your Linode account, we recommend using a password manager for this purpose.
Tags
Linode’s Cloud Manager and API v4 allow you to create tags to help organize and group your Linode resources. Tags can be applied to Linodes, Block Storage Volumes, NodeBalancers, and Domains. See the Tags and Groups guide to learn how to create, apply, and search for tags.
Events and Activity Feeds
Tasks performed using the Linode Cloud Manager or other account specific tools like Linode’s CLI or API will be logged to an individual Linode’s activity feed, or on your account’s Events Page. The events and activity pages are user accessible logs, or histories of events taking place on your account. They contain details regarding the most notable events affecting your Linodes, like reboots, shutdowns, migrations, and more.
For more details, see the Understanding Events and Activity Feeds guide.
My Profile
The My Profile section of Cloud Manager provides access to various settings related to your Linode account’s profile. This area of Cloud Manager contains access to the following features and settings:
- Changing your account’s associated email address and timezone
- Resetting your Account password
- Enabling two-factor authentication
- Enabling Third Party Authentication (TPA)
- Managing trusted devices
- Adding and managing public SSH keys
- Managing LISH authentication methods
- Adding and managing personal and third party API v4 access tokens
- Creating and managing OAuth Apps
- Accessing Linode referral codes
- Enable email alerts for account activity
API Keys / API Tokens
API Tokens (personal access tokens) are used in token-based authentication to provide users or programming scripts with different levels of access to your Linode account’s resources and services via the Linode API v4. You can create and manage your API tokens using the Cloud Manager.
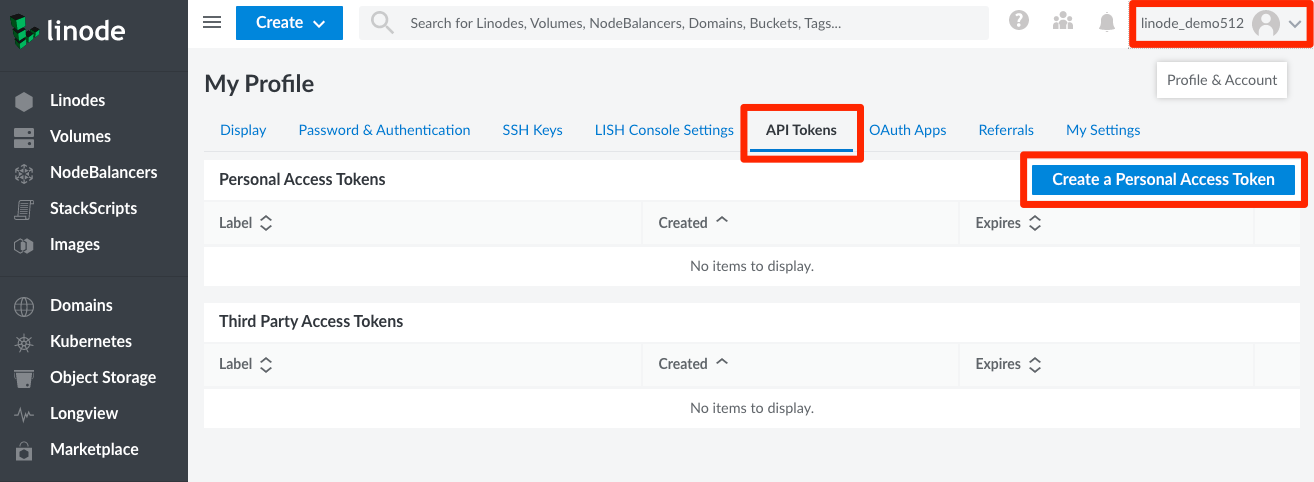
To generate a new personal access token, navigate to your profile by clicking on your username and select API Tokens.


Click Create a Personal Access Token. A panel appears that allows you to give this token a label and choose the access rights you want users authenticated with the new token to have.

When you have finished, click Create Token to generate a new Personal Access Token. Copy the token and save it to a secure location before closing the popup. You will not be able to view this token through the Cloud Manager after closing the popup.

OAuth Apps
The Cloud Manager supports the OAuth 2 authorization protocol. OAuth 2 allows a user to safely grant a third-party app permission to act on their behalf. This means that a user could authorize an app to access data and / or make changes to their Linode account and services that are exposed by the Linode APIv4. For example, an app could create or destroy Linodes, manage a NodeBalancer, or alter a domain.
To learn how to get started with OAuth Apps see the How To Create an OAuth App with the Linode Python API Library guide. For details on the Linode API v4’s OAuth workflow see the Linode API v4 documentation.
Manage Email Event Notifications
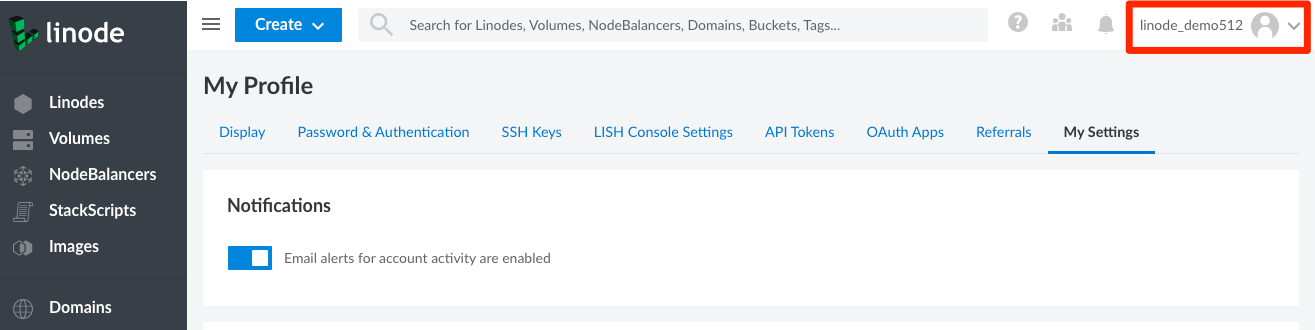
Email event notifications alert you when new events such as booting, shutting down, or updates to a Linode occur on your account. You can enable or disable email event notifications using the Cloud Manager.
Navigate to your profile by clicking on your username and select My Settings.


User Interface Enhancements
Dark Mode
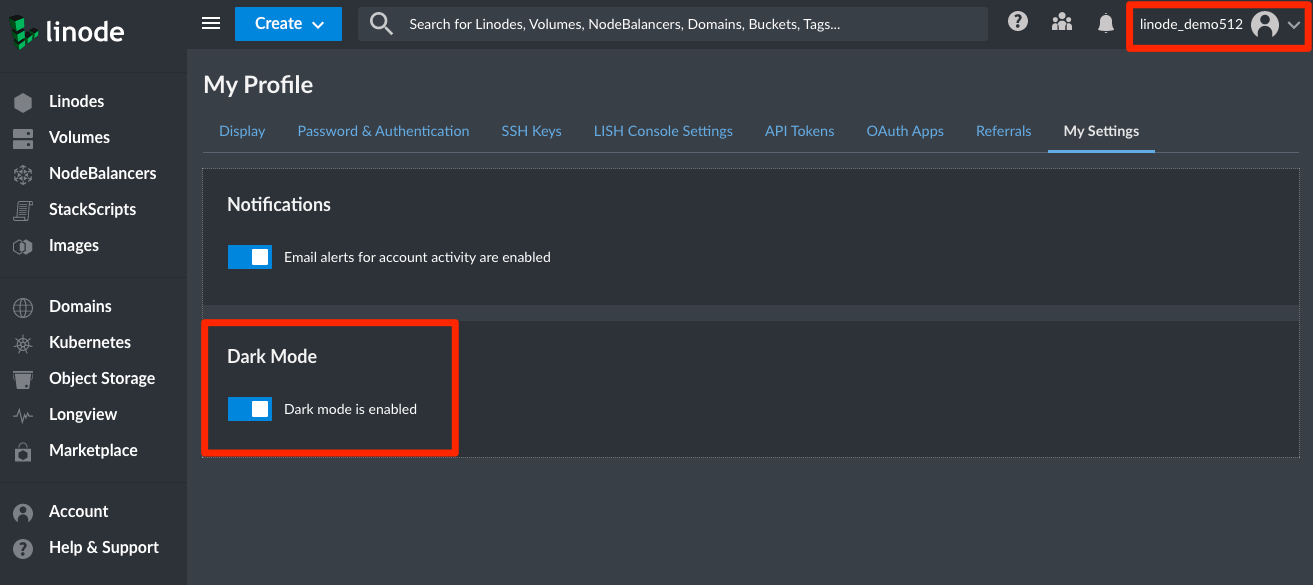
Cloud Manager provides a Dark Mode that you can toggle on and off depending on your preference.
Navigate to your profile by clicking on your username and select My Settings.
Toggle on Dark Mode to change the color scheme of the UI. Dark Mode is disabled by default.


Accessibility
The Linode Cloud Manager has been built with accessibility in mind. Currently, the Cloud Manager is actively being developed to achieve WCAG 2.0 Level AA.
We have received a lot of helpful feedback from our users regarding accessibility. While we have addressed a lot of your feedback, this is still a work in progress and will be iterated upon with time. If you have comments or requests regarding accessibility, let us know by filling out our feedback form.
This page was originally published on